#python #单元测试
Mac上安装依赖
1
2
|
brew install allure
pip install pytest allure-pytest
|
pytest的查找规则-可选项
pytest查找测试用例的默认匹配规则:
- 测试文件以test_开头(以_test结尾也可以)
- 测试类以Test开头,并且不能带有init方法
- 测试函数以test_开头
这个规则可以在pytest.ini配置文件修改,但没必要。一般来说,不用添加pytest.ini,非必须。
1
2
3
4
5
|
[pytest]

python_files = xxx_*.py *_xxx.py
python_classes = Test*
python_functions = test_*
|
文件结构和测试用例结构对照
我的项目:fish_util
- /Users/yutianran/MyGithub/fish_util
- test
- test_log_util.py
- init.py
- test_decorator_util.py
- src
- internal_var.py
- log_util.py
- init.py
- decorator_util.py
- content_format.py
- tree_util.py
- common_op.py
- test_allure.py
- init.py
- README.md
- .gitignore
- main.py
- start_pytest.sh
- environment.properties
生成的测试网页如下,可以看到Suites中的结构基本和文件结构一致,而且界面还挺好看的:

简单的测试文件
集成pytest和allure真的超级简单,默认可以什么都不配置,只需要测试函数以test_开头就可以集成了。
不过我推荐在测试函数上加上注解:@allure.feature(__file__),这样就方便文件结构和测试用例结构一一对应了。
然后再进阶的话就是玩一下pytest.fixture了,方便我们在测试用例上加上一些前置操作和后置操作。
 1
 2
 3
 4
 5
 6
 7
 8
 9
10
11
12
13
14
15
16
17
18
19
20
21
22
23
24
25
26
27
28
29
30
31
|
import pytest
import allure
import fish_util.src.log_util as log_util

logger = log_util.FishLogger(__file__)
print = logger.debug


@pytest.fixture()
def login_fixture():
    print("前置操作-login")
    return "login_fixture_value"


def finalizer_fixture(login_fixture_value):
    print("后置操作-logout: " + login_fixture_value)


@allure.feature("功能模块a")
class TestWithLogger:
    @allure.story("子功能b")
    @allure.title("用例c")
    @allure.feature(__file__)
    def test_case1(self):
        print("用例test_case1的输出")


@allure.feature(__file__)
def test_login_fixture(login_fixture):
    print("执行测试用例-test_login_fixture")
    finalizer_fixture(login_fixture)
|
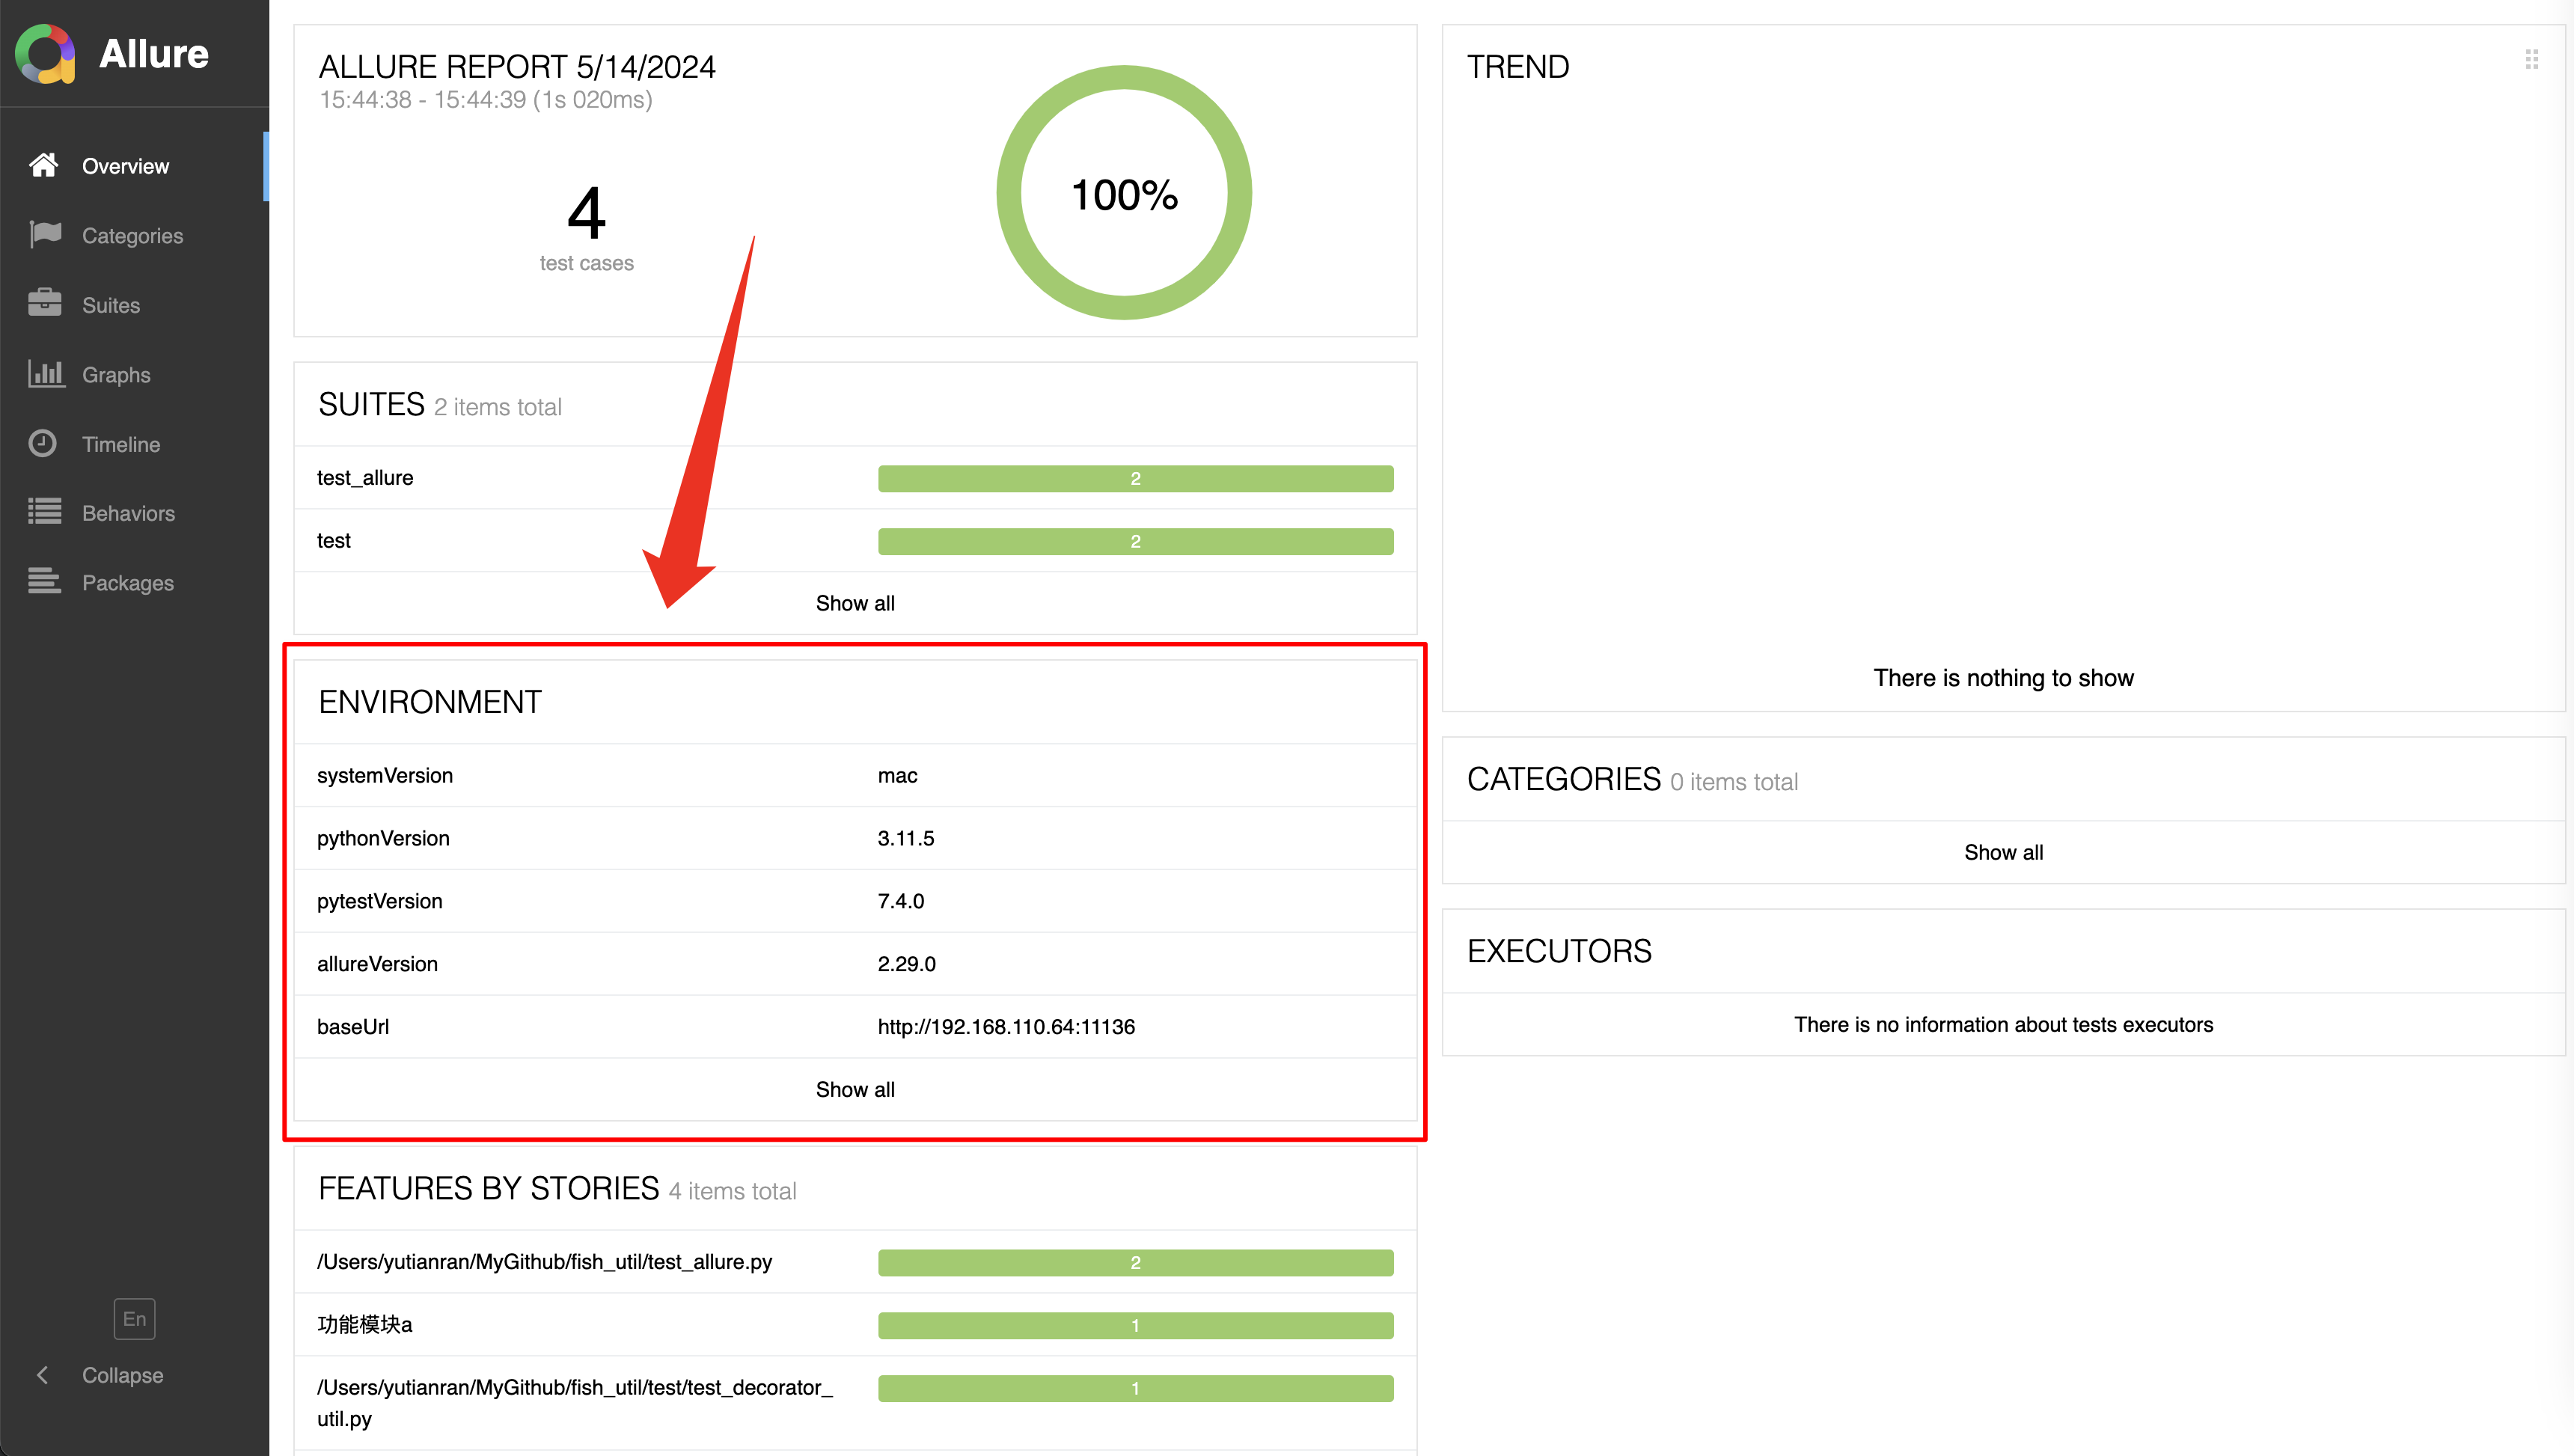
配置环境变量
environment.properties的配置是非必须的,不过推荐加上。因为加上很简单,方便后期调试。
1
2
3
4
5
6
7
|
systemVersion=mac
pythonVersion=3.11.5
pytestVersion=7.4.0
allureVersion=2.29.0
baseUrl=http://192.168.110.64:11136
projectName=fish_util
author=fishyer
|
然后就可以在allure的网页上看到环境变量了

一键生成测试报告
其实不复杂,不过为了方便一键生成报告,所以我写了一个shell脚本。大家要用的话,可以拷贝运行即可。运行成功后,会自动打开allure的网页。
 1
 2
 3
 4
 5
 6
 7
 8
 9
10
11
12
13
14
15
16
17
18
19
20
21
22
23
24
25
26
27
28
29
30
31
32
33
34
35
36
37
38
39
40
|
#!/bin/bash

# -q: 安静模式, 不输出环境信息
# -v: 丰富信息模式, 输出更详细的用例执行信息
# -s: 显示程序中的print/logging输出
# 使用相对路径,以适应不同环境
pwd
# 获取当前日期时间 YYYY-MM-DD_HH-MM-SS
timestamp=$(date +"%Y-%m-%d_%H-%M-%S")
# pytest -s -v . --clean-alluredir --alluredir=./cache/allure-results
# 不加 -sv 是为了防止自己的文件中的日志被吞,好像是会被覆盖了
pytest . --clean-alluredir --alluredir=./cache/$timestamp/allure-results

# 检查环境变量文件是否存在再复制
if [ -f environment.properties ]; then
  cp environment.properties ./cache/$timestamp/allure-results/environment.properties
else
  echo "Error: environment.properties does not exist."
fi

# 生成 Allure 报告
allure generate -c -o ./cache/$timestamp/allure-report ./cache/$timestamp/allure-results

# 优雅关闭进程
echo "Stopping process on port 11136"
pid=$(lsof -i:11136 -t)
if [ -n "$pid" ]; then
  kill $pid
  echo "Process on port 11136 stopped gracefully."
else
  echo "No process found on port 11136."
fi

# 使用 nohup 启动 Allure 服务
nohup allure open ./cache/$timestamp/allure-report -p 11136 > /dev/null 2>&1 &
echo "Allure server started on port http://localhost:11136."

# 直接查看指定时间戳的报告
# allure open ./cache/$timestamp/allure-report
# allure open ./cache/2024-05-14_15-44-26/allure-report
|
查看历史的测试报告
有时候,我们可能想看一下之前的测试生成的日志,这个时候可以使用命令:
1
|
allure open ./cache/2024-05-14_15-44-26/allure-report
|
2024-05-14_15-44-26是之前的测试的日期时间。在./cache文件夹下可以找到。
结语
有了pytest+allure,做单元测试是很方便了。不过还可以更强大,让它去做功能测试和集成测试:比如配合postman做接口自动化测试、配合playwright做网页自动化测试、配合Appium做移动端自动化测试。感觉以前一天的测试工作,现在完全可以缩小为10分钟就搞定了。


